Nsx Dfw Logging to Syslog Server
One of the strongest features of NSX is that every single VM is protected by the Distributed Firewall (DFW). If logging is enabled the logs of the DFW are written in a file called “dfwpktlogs.log” on the local ESXI host, where the VM is hosted. (on pre 6.1 installation, these logs are written in the “vmkernel.log”. It is however very easy to collect those logs on a centralised syslog server, which makes troubleshooting or just onderstanding the working of NSX much easier. Below I’ve written down the steps to quickly setup a centralised syslog server and how to collect the DFW logs.
Setting up the syslog server
First make sure you have a linux machine up and running, which will act as syslog server, in my case it is a Debian 8 machine. RSyslog which we will use for this example is installed by default (as it is on most distros), but not enabled. Make sure you have the right permission and edit the file /etc/rsyslog.conf.
nano /etc/rsyslog.conf
Uncomment the following lines;
#$ModLoad imudp
#$UDPServerRun 514
So it will result in:
$ModLoad imudp
$UDPServerRun 514
Add the following lines before the “Global Directives”, so all logging will be collected and place within a subdirectory /var/log/rsyslog.
$template RemoteLogs,"/var/log/rsyslog/%HOSTNAME%/%PROGRAMNAME%.log" *
\*.\* ?RemoteLogs
& ~
Start the rsyslog deamon by running
service rsyslog start
This is enough on the syslog side, you can check with “netstat -nau” if your server is listening on udp port 514. For more about the rsyslog server you can use this link, it was my resource. Configure vSphere Make sure SSH is enabled on your ESX hosts and SSH into it. Use the following commands to open up the firewall and enable the syslog server.
esxcli network firewall ruleset set --ruleset-id=syslog --enabled true
esxcli network firewall refresh
Set the syslog server, don’t forget to change it with your own IP of the syslog server.
esxcli system syslog config set --loghost=udp://10.20.20.10:514
esxcli system syslog reload
Check if the logs are received by the syslog server, by listing the rsyslog directory on the syslog server.
root@syssrv:/# ls -ltr /var/log/rsyslog/
total 20
drwx------ 2 root root 4096 Dec 2 20:58 NSX-edge-3-0
drwx------ 2 root root 4096 Dec 3 00:08 syssrv
drwx------ 2 root root 4096 Dec 3 00:40 nsxmanager.lab.breekeenbeen.nl
drwx------ 2 root root 4096 Dec 3 08:58 esx03
drwx------ 2 root root 4096 Dec 3 09:04 esx04
Before the firewall logs will appear, you need to enable logging on the distributed firewall rules. You only have to do this once for every action you want to have logged, since it is euhm…a distributed firewall. Go to you distributed firewall and click on the pencil in the action column on the corresponding line.
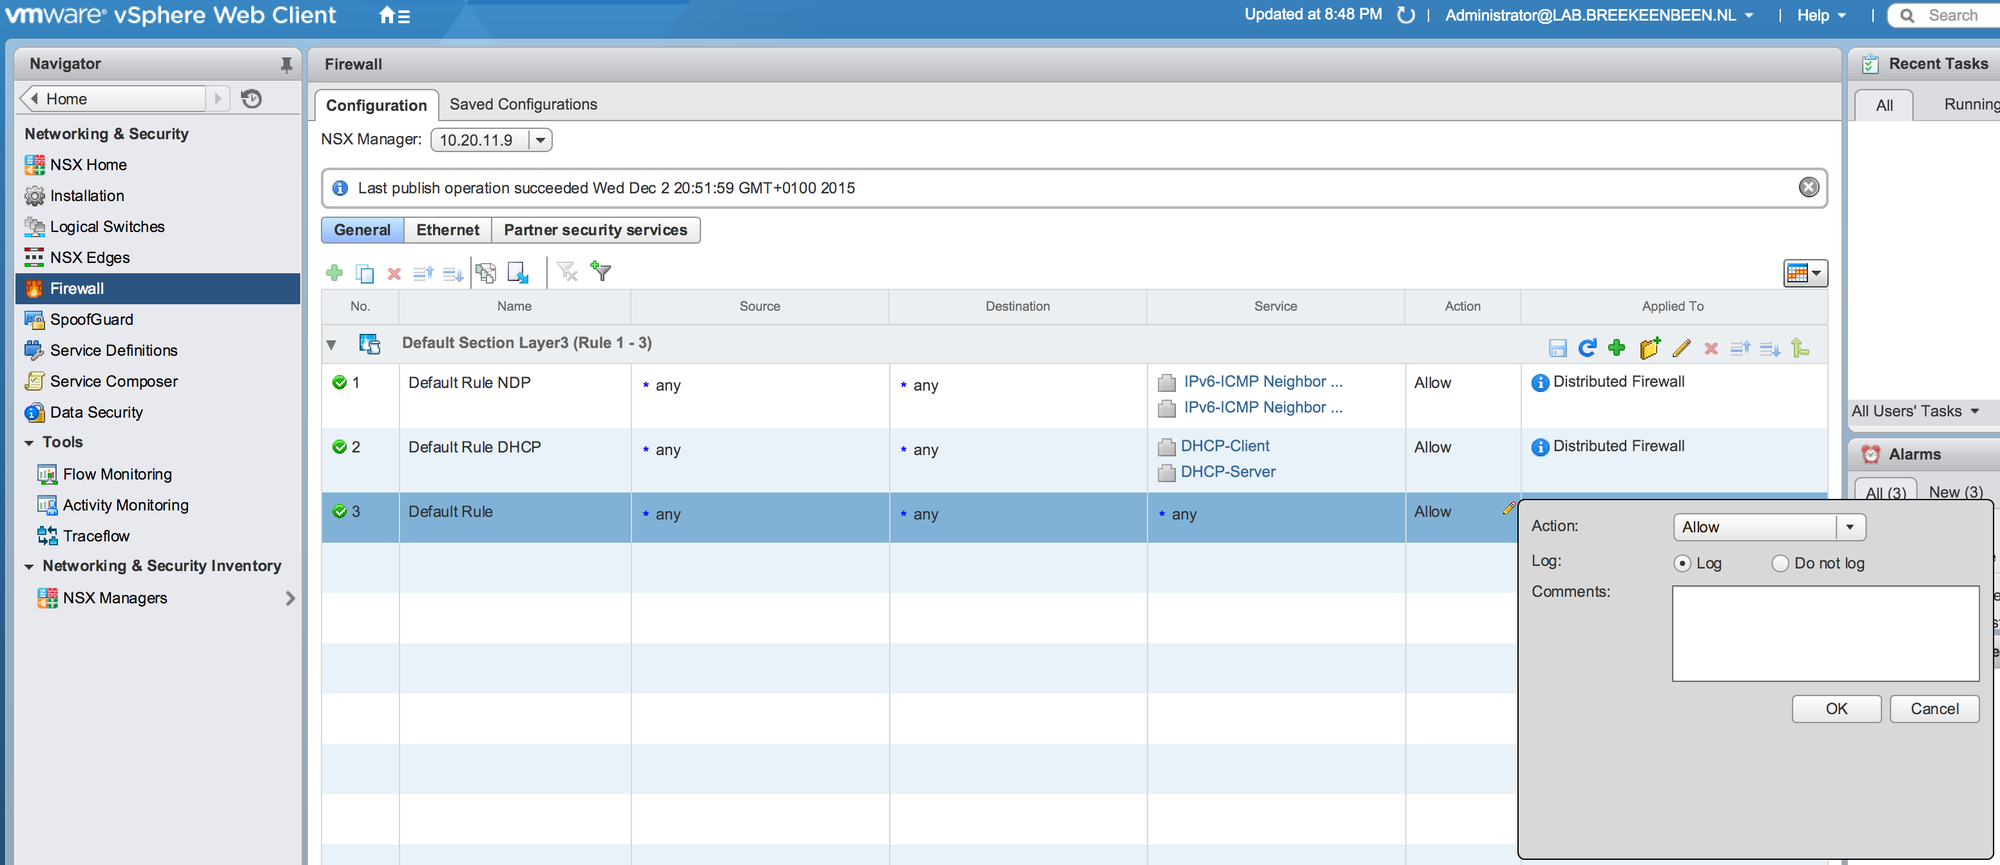
Don’t forget to publish the changes.

Now generate some traffic to or from one of the machines living on the host, where you just enabled remote syslog. If you look in your “.\rsyslog\host” directory on the syslog server, you should see a file “dfwpktlogs.log” appear.
root@syssrv:/var/log/rsyslog/esx04# ls -ltr
total 180
-rw-r--r-- 1 root root 190 Dec 3 09:04 storageRM.log
-rw-r--r-- 1 root root 136 Dec 3 09:10 syslog.log
-rw-r--r-- 1 root root 2420 Dec 3 09:10 hostd-probe.log
-rw-r--r-- 1 root root 623 Dec 3 09:13 vmkernel.log
-rw-r--r-- 1 root root 948 Dec 3 09:14 crond.log
-rw-r--r-- 1 root root 618 Dec 3 09:14 root.log
-rw-r--r-- 1 root root 710 Dec 3 09:14 vsfwd.log
-rw-r--r-- 1 root root 15707 Dec 3 09:14 Rhttpproxy.log
-rw-r--r-- 1 root root 62832 Dec 3 09:14 Vpxa.log
-rw-r--r-- 1 root root 964 Dec 3 09:14 dfwpktlogs.log
-rw-r--r-- 1 root root 60542 Dec 3 09:15 Hostd.log
You can easily view this file by cat or tail.
root@syssrv:/var/log/rsyslog/esx04# tail -f dfwpktlogs.log
2015-12-03T08:13:11.436Z esx04 dfwpktlogs: INET match PASS domain-c43/1001 OUT 73 UDP 192.168.2.12/37840->10.10.11.3/53
2015-12-03T08:13:21.446Z esx04 dfwpktlogs: INET match PASS domain-c43/1001 OUT 53 UDP 192.168.2.12/46936->10.10.11.3/53
2015-12-03T08:13:31.457Z esx04 dfwpktlogs: INET match PASS domain-c43/1001 OUT 73 UDP 192.168.2.12/45453->10.10.11.3/53
2015-12-03T08:13:41.468Z esx04 dfwpktlogs: INET match PASS domain-c43/1001 OUT 53 UDP 192.168.2.12/59795->10.10.11.3/53
2015-12-03T08:13:48.515Z esx04 dfwpktlogs: INET TERM domain-c43/1001 OUT UDP 192.168.2.12/37840->10.10.11.3/53 2/0 146/0
2015-12-03T08:13:58.531Z esx04 dfwpktlogs: INET TERM domain-c43/1001 OUT UDP 192.168.2.12/46936->10.10.11.3/53 2/0 106/0
2015-12-03T08:14:07.543Z esx04 dfwpktlogs: INET TERM domain-c43/1001 OUT UDP 192.168.2.12/45453->10.10.11.3/53 2/0 146/0
2015-12-03T08:14:16.560Z esx04 dfwpktlogs: INET TERM domain-c43/1001 OUT UDP 192.168.2.12/59795->10.10.11.3/53 2/0 106/0
If you want to see the logging of multiple files and follow it when new lines are written, I find it easy to use a tool called, “xtail”. You can simply install it from the Debian repositories.
aptitude install xtail
You can easily start xtail by passing the multiple files you want to follow. The below example is an SSH session started from a VM (192.168.1.11) on host ESX03 to a VM (192.168.1.12) on host ESX04. As you can see, the first hit on the DFW is the outgoing traffic on ESX03 and a than the incoming traffic on ESX04. It is also worth noticing that these VM’s are living on the same subnet and still passing the firewall, pretty cool :-)
root@syssrv:/var/log/rsyslog# xtail ./esx03/dfwpktlogs.log ./esx04/dfwpktlogs.log

\*\*\* ./esx03/dfwpktlogs.log ***
2015-12-03T08:56:25.241Z esx03 dfwpktlogs: INET match PASS domain-c41/1001 OUT 60 TCP 192.168.1.11/33790->192.168.1.12/22 S

\*\*\* ./esx04/dfwpktlogs.log ***
2015-12-03T08:56:27.162Z esx04 dfwpktlogs: INET match PASS domain-c43/1001 IN 60 TCP 192.168.1.11/33790->192.168.1.12/22